Advanced NSFW Light Techniques Masterclass
Masterclass: Advanced Lighting Techniques for High-Octane NSFW Shoots
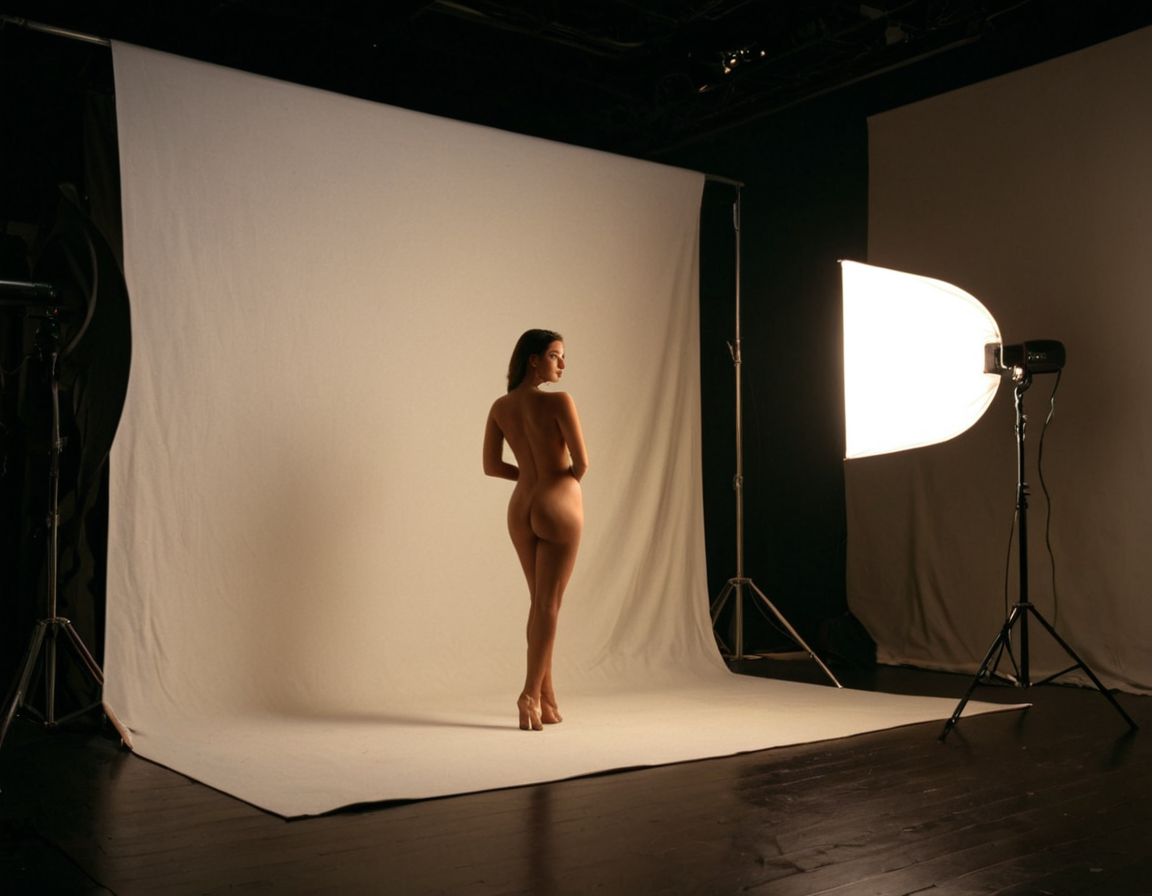
Lighting is a crucial aspect of creating an immersive and engaging visual experience, particularly in high-octane NSFW shoots. A well-designed lighting setup can elevate the mood, atmosphere, and overall aesthetic of a scene, while a poorly executed one can detract from it. In this article, we will delve into advanced lighting techniques for creating captivating and provocative content.
Understanding the Fundamentals
Before diving into advanced techniques, it’s essential to understand the basics of lighting. Lighting is not just about throwing a light source at your subject; it’s an art form that requires careful consideration of various factors, including color temperature, intensity, and direction.
Color Temperature
Color temperature refers to the warmth or coolness of a light source. Warm white lights (2700K-3000K) tend to create a cozy and intimate atmosphere, while cool white lights (5000K-6500K) produce a colder, more clinical feel. For high-octane NSFW shoots, it’s often desirable to use cool white or daylight-balanced lights to create a sense of realism and verisimilitude.
Intensity and Direction
Intensity refers to the overall brightness of a light source, while direction refers to its orientation in relation to your subject. Controlling the intensity and direction of light is crucial in creating depth, dimension, and visual interest in an image.
Advanced Lighting Techniques
Now that we’ve covered the basics, let’s move on to some advanced techniques for creating captivating and provocative content.
1. Sidelighting and Backlighting
Sidelighting involves positioning a light source at a 90-degree angle to your subject, while backlighting involves placing a light source behind your subject. Both techniques can create dramatic effects, but they require careful execution to avoid harsh shadows and unflattering light.
Step-by-Step Guide:
- Position the light source at a 90-degree angle to your subject.
- Adjust the intensity and direction of the light to achieve the desired effect.
- Use a reflector or diffuser to soften harsh shadows and create more flattering light.
2. Lighting Modifiers
Lighting modifiers, such as softboxes, umbrellas, and grids, can help control the shape and distribution of light. These tools can be used to create complex lighting setups that add depth and visual interest to an image.
Step-by-Step Guide:
- Research different types of lighting modifiers and their applications.
- Experiment with different combinations of modifiers to achieve unique effects.
- Use a lighting modifier to control the intensity and direction of light, creating more flattering and natural-looking results.
3. LED Lighting
LED lights offer a range of benefits over traditional lighting sources, including energy efficiency, portability, and durability. However, they can also produce harsh, unflattering light if not used correctly.
Step-by-Step Guide:
- Research different types of LED lights and their applications.
- Experiment with different LED lights to find the one that best suits your needs.
- Use a diffuser or other lighting modifier to soften harsh shadows and create more flattering light.
4. Advanced Lighting Software
Advanced lighting software, such as Adobe Lightroom and Photoshop, can help you achieve complex lighting setups and manipulate existing images.
Step-by-Step Guide:
- Research different lighting software options and their applications.
- Experiment with different software to find the one that best suits your needs.
- Use advanced lighting software to enhance and refine existing images, creating more captivating and provocative content.
Conclusion
Mastering advanced lighting techniques takes time and practice. By understanding the fundamentals of lighting and experimenting with different techniques, you can create captivating and provocative content that elevates your visual experience. Remember to always prioritize your safety and well-being when working with light and camera equipment.
What’s next?
Experiment with different lighting setups and techniques to find what works best for you and your brand.
About Valeria Pereira
Valeria Pereira | Curator & Editor at voyeurpicture.com, where the lines between intimacy and art blur. With a background in fine arts and photography, I help bring provocative stories to life, fostering a space for anonymous confessions and seductive narratives that spark desire.